Here’s your printable planner organization to keep a routine with beautiful watercolor Magnolia and Eucalyptus in pink and green.
*** Update: This printable is not free anymore. You can find it in my Ety Shop.
We all need to stay organized and set a routine even when we have less to do.
This planner for April is the same as the ones I created for some months.
Here are some suggestions to write or do, in your planner instead of appointments, gatherings, and work schedule:
- tasks for Spring cleaning
- at the end of the day, what you did
- homeschooling for your kids
- decorate your planner with stickers
- tracking the tasks, you do every day (decluttering, purging, cleaning)
- doodling
- journaling
- hand lettering
- write daily quotes
- meals planning
- what you read, watch, listen
- and so on…
There are no rules on how to use a planner. What makes a good planner for you, it’s what you decide to do with it.
This post may contain affiliate links. If you click on my affiliate links and make a purchase, it doesn’t cost you more for the product. I will receive a small commission. You can read my full disclosure policy.
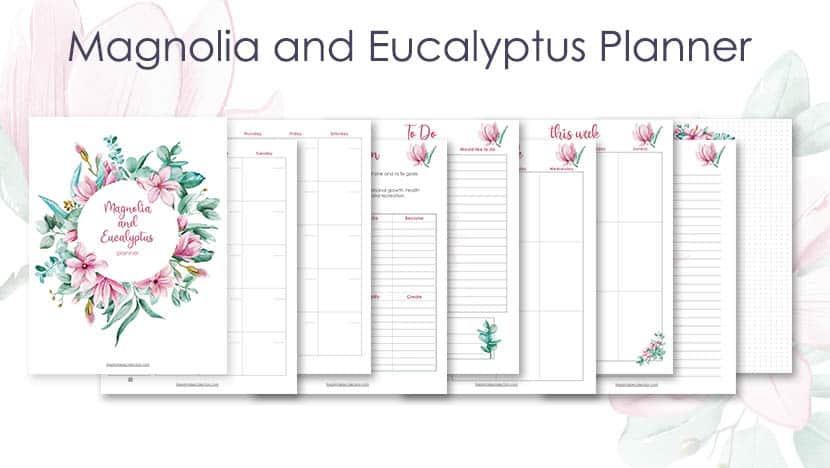
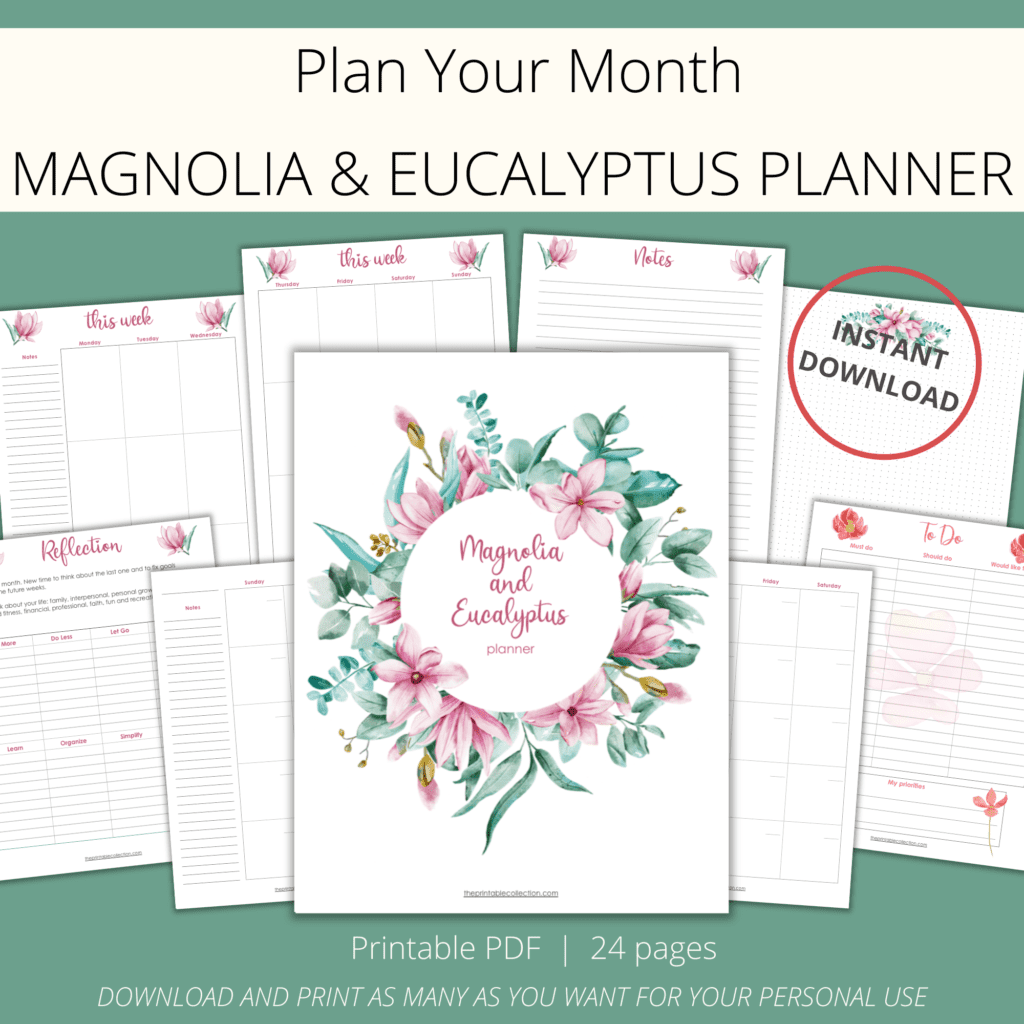
What’s in your printable planner organization for April
The vertical planner for April is not different from the ones you got in the last months.
It’s one with magnolias and eucalyptus foliage.
Here are the pages in it:
- a Monthly calendar on two pages
- a Reflection page to think about the last month
- a To do page
- some Notes pages and dotted ones
- and for each week, two pages spread in a vertical layout.
They can be used in a binder because the dimensions of the pages are Letter US (8 1/2 x 11 inches).
You can also print them for the size of a classic Happy Planner, that’s what I do each month.
I also give you the way to print this planner in an A5 format.
To know how to scroll down and read the section: How to print this planner.
–> Before printing the PDF file, please read the section below to get the best results possible.
Here are some of the pages you can find.
–> French Version is also available.
Version en français également disponible.
You may also like…
- Printable Planner Stickers Printable For April
- Printable Butterflies Planner
- Printable Daily Planner
How to print this planner
Which paper to use
To get the best result possible, I suggest using thick paper to print it.
You can write down on each page without the ink bleeding on the other side.
I like this paper, and I’m so glad I bought it! It is smooth at the touch and bright. And, the best, it is thick, and I don’t see ink on the other side.
I found that using these Staedtler pens and these Stabio ones is the best choice over ballpoint pens. The ink from the pens dries very fast.
Don’t forget to buy paper according to your printer: inkjet or laserjet.
How to resize for the Classic Happy Planner
If you want to resize the dimensions of the pages for the Classic Happy Planner, you can use Adobe Acrobat Reader DC to open the file and set some preferences.
The dimensions of the pages are Letter US size (8 1/2 x 11 inches). If you have a Big Happy Planner, print.
To fit your Classic Happy Planner, print at 82 % of the real dimensions.
Follow the steps below.
- Click on the printer icon, or choose File –> Print in the menu.
- Search for Custom Scale and replace the 100 % with 82 %.
You will also be able to choose the pages you want to print.
And last, under the Custom Scale, you will find Print on both sides of paper. Checked the box.
In the Resource Library, you can find a template with black lines to help you cut your pages to fit perfectly the Classic Happy Planner.
Print this template, place a page you just printed over it, trace some lines, and cut.
Punch them with a punch for a discbound system like the Mambi one.
Place them in your planner between the two pages of your week.
How to resize for the A5 format
Now, if you prefer a planner in the A5 format, here’s what you can do.
Using Adobe Acrobat Reader DC, you can print your planner as a booklet, so each page will be in the right order on both sides when you cut them in half.
Here’s what you have to do.
1- Click on the printer icon, or choose File –> Print in the menu.
2- In the Pages to Print area, select All prints pages from front to back.
3- In Page Sizing & Handling and click on Booklet.
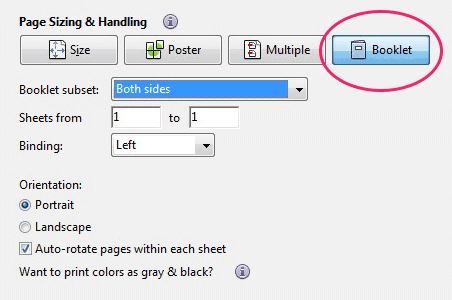
4- Let the choice “Both sides” in the Booklet subset.
5- Don’t change the numbers in the Sheets from boxes.
6- Select Auto-Rotate Pages to automatically rotate each page for the best fit in the printable area.
Cut each page in the middle and rearrange the order of them.
Punch holes and place them in your planner.
So, how will you use your planner?
Remember, the best way to use a planner is your way!
This one will help you feel organized, and you will be able to install a routine.
Monique
You may also like…
- Printable Planner Stickers Printable For April
- Printable Butterflies Planner
- Printable Daily Planner
Share this printable on Pinterest.
Pin it on your favorite board!